What Can Be Done About Driveway Pitting? A Basic Guide

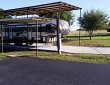
Concrete driveway pitting is a frustrating issue for many homeowners. Some driveways begin to pit after a few years, while some show signs of pitting after only a few months. Pitting, also known as spalling, is when small holes, or “pits,” show up on a driveway’s surface and make it look uneven and worn.
4 Common Causes of Driveway Pitting
- Climate exposure. In cold and harsh climates, a driveway’s exposure to snow, rain and/or sleet during the winter and spring months can spell doom for the top layer of the concrete. If, for example, snow melts on the top of the driveway after a blizzard, the concrete will absorb the liquid that results, and weaken over time because of that absorbed water freezing and thawing over and over again. This freeze-thaw cycle causes small pits to form on the driveway’s surface.
- Bad concrete mixing. Should your concrete mix be wrong for your location and climate, it may come back to haunt your driveway later in the form of spalling. In order to make sure you mix the right type and proportions of concrete, be sure to consult local building codes for your city, town or geographical area.
- Incorrect concrete curing. The curing process is one of the final steps in proper concrete installation -- and also one of the most important. Not curing properly (or skipping this step altogether) sets your driveway up for spalling problems later on -- as well as serious cracking, crumbling or other structural issues.
- Aging. Concrete is a strong building material if used properly, but that doesn’t mean that it isn’t also susceptible to aging. Heavy use of a driveway, combined with the concrete’s aging, can cause damage such as serious pitting. In this case, installing a new driveway may be your only option.
Driveway Pitting DIY Repair
Concrete pitting repair is fairly simple to fix yourself. Do it right to make sure that your new concrete lasts as long as possible and remains free of future pitting or spalling issues. Here is a brief how-to.
Supplies
Epoxy
Caulking gun (for smaller pits)
Small trowel
Stiff broom or brush
Hose
Concrete mix
Chisel and hammer (for larger pits)
Plastic sheeting (for larger pits)
Concrete sealant
How-to
- Clean the pits well to rid them of dirt, debris and loose bits of concrete. You can clean small pits with a stiff brush; for larger pits, a sturdy broom will do fine.
- Spray the concrete pits with a hose to flush out any remaining bits of waste.
- If you are dealing with a series of small pits, fill the pits using a caulking gun loaded with premixed epoxy, formulated specifically for concrete. Level off any epoxy that has risen from the holes so that it’s flush with the concrete surface. Leave to set for at least 24 hours before applying a concrete sealant to protect the new concrete from wear and tear.
- For larger pits, start by chiseling out a little concrete so that the bottoms of the holes are a bit wider than the tops. (This will help your repair to “stick” better.) Clean with a pressure washer. Apply a concrete resurfacing compound, mixing small batches, so you won’t have to throw away any unused or dried-out concrete. Pour the mixture into the holes and level off using your trowel.
- Protect your repair from rain and foot traffic for at least 6 hours. Don’t allow any vehicles on the driveway for a minimum of 24 hours.
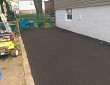
For truly professional driveway pitting repair, hire a reliable concrete contractor.


Looking for a Pro? Call us (866) 441-6648

Concrete Average Costs
Concrete Contractors Experiences
Paving My Driveway Was An Easy And Pleasant Experience
We Finally Extended Our Concrete Patio And Our Yard Looks Amazing