Adhesive Vinyl Floor Tiles
 Ready for a new look in your kitchen or bathroom? Or perhaps your flooring is just starting to seem worn out? Adhesive vinyl floor tiles are a good option, giving you versatility for a reasonable cost. Here we will look at what you need to know about adhesive vinyl floor tiles and how to get the most for your money.
Planning the Project
Laying adhesive vinyl floor tiles is a project of moderate difficulty, requiring a certain amount of patience and precision. To make your selection for a design or style, you can either take a trip through your phone book to check out local flooring outlets, or you can go online. Many companies do not charge shipping.
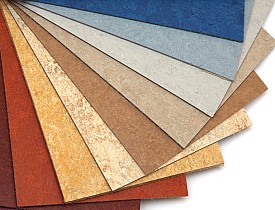
Costs for adhesive vinyl floor tiles range from around $10 a box to $45 a box, or about 75 cents to $3 a square foot. You can achieve the look of ceramic tiles, wood or stone with adhesive vinyl floor tiles.
Sizing
You will need to know the square footage of the room in which you plan to lay adhesive vinyl floor tiles. Tiles are 12" by 12" and come in varying thicknesses. Don't go for the very thin tiles, as they will wear out quickly.
Once you know the square footage of the room, you can estimate the cost and number of tiles needed. It's a good idea to purchase a few extra tiles in case of mistakes. For example, if you have an 8' by 10' room (80 square feet), buy 90 tiles. Then you have 10 extra tiles to work with.
The Tools
You will need the following tools to set your adhesive vinyl floor tiles:
- Measuring tape
- Utility knife or tile cutter (you can rent tile cutters)
- Chalk line
- Tile roller (also can be rented - some people use a large rolling pin)
Important Tips
I can't emphasize enough that the floor surface (linoleum, plywood, cement, etc.) must be clean and free of holes, cracks, dips or any other damage. Sand, dirt and grit will inhibit the bonding process, as will old adhesives or a glossy surface. Make sure your surfaces are dry before laying down adhesive vinyl floor tiles.
Leave the tiles in your home for 24 to 48 hours to allow them to adjust to the temperature. You will need to pry off any molding and replace it after you lay the tiles. Sun can damage or bleach tiles, so you may need a throw rug here or there once the tiles are laid. Don't take the paper off of the tiles and begin laying them until you are absolutely sure of your measurements.
Measuring
Separate the room into quadrants. Using a chalk line, find the center of the room and lay two sharp cross lines. Find the center of the room by measuring the center of each wall and snapping the chalk line between opposing walls. Vents, door jambs or fixtures such as tubs will require careful measurements. You want to leave as little gap as possible between tiles. You will likely need to trim some tiles with a utility knife.
Laying Adhesive Vinyl Floor Tiles
The first tile you lay is the most important. If that tile is off, the rest will be off too. Work in quadrants. If you are nervous, lay the tile with the paper backing on first. This may be more time consuming, but you'll get a better visual which will help you feel more confident. You will likely have to cut tiles to fit the edges of the room and around spots such as vents. A tile cutter will make the job easier and more precise.
Once you have laid the adhesive vinyl floor tiles, roll over them with a heavy tile roller (or rolling pin) to help the adhesive bond.
Lastly, don't wash the floor for a few days to allow the adhesive to cure.
If you decide you want to go with real tiles and not vinyl ones, you have some choices to make. Read about ceramic tile, marble tile, slate and other options.


Looking for a Pro? Call us (866) 441-6648

Remodeling Average Costs
Remodeling Contractors Experiences
Look To Independent Contractors For Fast Service And Good Prices

Floor Tile Replacement In Every Inch Of The House