DIY Concrete Counter Tops Are a Lot of Work
 When brave, experienced do-it-yourselfers think of a concrete countertop project, it seems easy and inexpensive ... nothing to be intimidated by, just mix some cement, pour, and spread. Sounds simple, but while cement countertops can be lovely, there is much to be considered when the process is examined in depth. Let’s look at the pros and cons of DIY concrete counter tops.
DIY Concrete Counter Tops: Pros
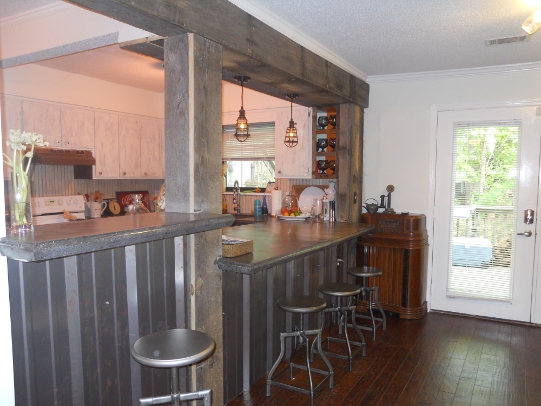
On THE POSITIVE side, concrete counter tops are thick and rich looking and you can select different profile edges to suit your taste and style. The uneven color and texture gives the countertop a movement like natural stone, which is very appealing. They are much less expensive than natural stone and you can do the project yourself, which has a positive impact on your wallet. There is a nice variety of colors to choose from due to the dye additive.
A design advantage is that the damp cement allows an opportunity to stamp a pattern on the top, decorating only the border or the whole counter. For example you can make the countertop look like brick, canyon stone or slate tile by pressing a plastic overlay form to stamp a pattern in the cement.
Another positive aspect is the durability. We all know that cement holds up for many years even under harsh usage, such as in warehouses that use heavy equipment like forklifts. This fact makes concrete a great product for counter tops in both indoor and outdoor kitchens.

DIY Concrete Counter Tops: Pros
THE NEGATIVE aspects of the project are as follows: Concrete countertops take a lot of prep work. The first thing that must be done is cover all of the cabinets and floors with plastic as the cement is messy; drips and spills will occur. Next you must attach cement board to the top of the cabinet bases. Then lay wire mesh on top of the cement board and attach at least the top and bottom of each piece to prevent the mesh from floating to the top of the wet cement. Next, screw the profile edge to the cement board. Once all of this is accomplished, the real work begins.
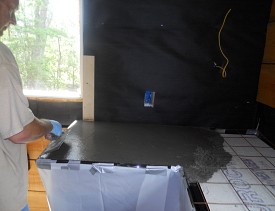
HARD LABOR: Start by pouring bags of concrete into a mixer, adding water and mixing. Next, scoop the cement into a 5 gallon bucket, carry and pour the cement onto the counter area. Warning -- the bags of cement are heavy and they get heavier as the day goes on! This job takes at least 2 people -- one to mix and pour the concrete, the other to trowel and spread the mixture. If there is a third person, the project go much more smoothly, since they can help at each station and pack the cement mixture against the counter edge form.
Please note that the person mixing and carrying the cement has to have a strong back to pour the bags of cement into the mixer and to tote the buckets from the mixer to the counter, over and over again.
The person that trowels and spreads the cement to create the concrete countertop has to keep a level on it or it will dry uneven and the counter tops will appear to tilt. Once you start this process, you cannot stop; otherwise the cement will harden in the mixer and on the counter top as well. Once it is poured, troweled, and leveled, the entire surface must be patted to remove air bubbles so the counter top doesn't dry with little holes and imperfections throughout the surface that cannot be removed. The counter edges have to be vibrated with a vibrating sander to insure that the cement is firmly packed, preventing gaps and weaknesses in the finished edge. Timing is critical.
The next step is to sand the dry counter tops 12 hours after completion. If you let the cement get too dry it is more difficult to get a good finish. The last step in the process is to seal the counter tops with a chemical that prevents stains. This can be applied with a special roller.
Some of the unexpected expense of the project lies in the purchase of the forms and additives. However, without these, the look isunattractive and without the concrete additives that release agents to prevent cracks, the countertop will not hold up and perform well. Bear in mind what a daunting job it would be to remove undesirable cement counter tops!
The last negative is the cleanup work. Removal of the plastic is standard, but the dust from the sanding spreads into other areas of the house even when plastic temporary walls are created.
Now that you know the truth about the project, the basic process, and materials, you can weigh the pros and cons. The result of the hard work is gorgeous countertops at a fraction of the cost of natural stone, not to mention the satisfaction of doing it yourself! However, if you love the look but don't have the patience or the physical strength to DIY, why not hire a professional to install your concrete counter tops?
Lee Anne Culpepper writes for networx.com.
Updated August 27, 2018.
Looking for a Pro? Call us (866) 441-6648

Remodeling Average Costs
Remodeling Contractors Experiences

Exposed Aggregate Driveway Replaces Unattractive Amosite Asphalt

Our New Concrete Sidewalk Is Just What We Were Hoping For


