Quick Concrete Fix: Crack Injection
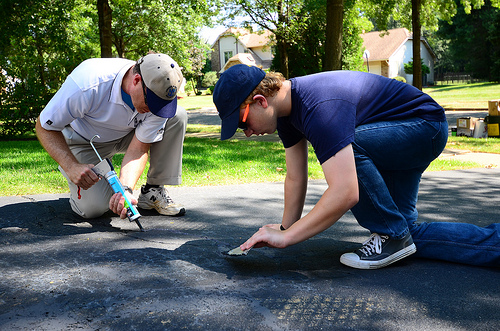
Photo of two guys doing a DIY crack injection project on a cracked driveway by slgckgc/Flickr.
Fixing cracks in concrete? If the cracks are small, you can easily DIY. These days, crack injection is the best way to go for this type of concrete repair. Find out why and how it works.
Mastic vs. Crack Injection Epoxy
Conventional products for repairing concrete cracks are mastic—essentially a caulk, not unlike the silicone goo that's sprouting mold in your shower. Because mastics keep out dirt and water (and thus ice formation), these product do help, but sealing the crack is really all they do. They don't bond the concrete or add any strength.
Crack injection epoxy is different. It acts more like a caulk mixed with ultra-turbo super glue. That means it seals AND bonds the concrete. And unlike real super glue, which seems to work about 0.01% of the time, injection epoxy sticks, even if the concrete remains dry, damp or completely wet after the repair. It also works on vertical and horizontal surfaces, so you can use it to repair driveway slabs and basement walls, plus curbs, steps, swimming pools and, yes, garden gnomes.
How Crack Injection Works
Remember fixing stuff with two-part epoxy in the old days? You bought a kit with two little tubes that looked like ointment containers. After carefully squirting a dollop from each tube onto a paper plate, you mixed the two globs together with a Popsicle stick. This imprecise, messy process left you with about 5 minutes to apply the epoxy and hope you mixed the right proportions; if you used too much resin and not enough hardener, your glue wasn't so strong. These days, all-purpose epoxy is available in a special two-chamber syringe that dispenses equal amounts of hardener and resin. You still have to do the mixing but at least you know the proportions are right.
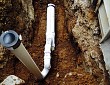
Concrete injection products take the foolproofing one big step further. The mixing is done right in the applicator, which looks and works just like a tube of caulk. The resin is in the tube, and the hardener is in a long nozzle that attaches to the tube. Once the nozzle is secure, you turn a knob that lets the hardener flow down into the resin. Give the applicator a good shake, pop it in your caulking gun and you're ready to get crackin'.
The bond of concrete epoxy is chemical; that's why it lasts and why it's strong ... stronger in some ways than the concrete itself. Fully cured epoxy is resistant to water, as well as many common acids and solvents. It can also be chiseled, grinded or sanded, as well as painted (good news for your beloved garden ornaments).
Application Methods
Injection epoxy is applied with a caulking gun, but the material is much less viscous than caulk so it can flow into small cracks. For repairs on horizontal surfaces, you simply fill the crack until the epoxy is flush with the surrounding surface, then let it cure.
Vertical application is a lot more involved, and this is where the "injection" comes into play. Start by epoxying plastic injection ports to the wall, every 8 inches or so along the crack (here, you're back to portioning and mixing the epoxy the old-fashioned way). Then seal over the crack with a swath of the hand-mixed epoxy, creating a continuous dam or seal that keeps the thin repair epoxy from oozing out during the injection process. Fill the crack using a caulking gun and the same epoxy tube and nozzle utilized for horizontal repairs but with the addition of a hose that attaches to the injection ports. Start at the bottom and work your way up, filling the crack full and closing the ports as you go. After the epoxy cures for a day, knock off the ports with a hammer, then grind excess epoxy from the wall before painting (if desired). Ports and hand-mix epoxy are sold in all-inclusive kits by the same folks who manufacture injection epoxy.
Important Considerations
Check the product specifications regarding the size of crack the product will fill. One major brand sets the range at 1/64 inch to 1/4 inch wide. Follow the manufacturer's preparation and application instructions to the letter. Things like temperature—of the epoxy, the air and the concrete—are important, as are the specific prep steps for each application. For the best bond with epoxy, you really get only one chance, so take your time to do it right, and wait for warmer (or cooler) weather if necessary.
Injection epoxy is designed for solid concrete, not concrete block (cinder block), brick or other porous masonry materials. The thinness of the epoxy can be a complicating factor: It's nice for filling small cracks, but if a crack runs all the way through a wall or slab, the epoxy can too. If there's access to both sides of a wall you can seal over the crack on two sides with the hand-mix epoxy, as described, but of course this option isn't applicable to slabs on grade (on the ground) or subgrade (underground) portions of foundation walls; in these cases, the earth or subbase materials should provide some backing, but you may end up using a lot more epoxy than anticipated.
Don't expect crack injection to save a failing concrete structure. If your foundation walls are moving (you can test this with some pencil marks, a ruler and periodic measuring), consult a concrete pro, qualified builder or structural engineer before attempting repairs with epoxy or any other product. Injection epoxy can't be applied in cracks which are admitting flowing water; you have to stop the water before making the repair. For large gaps or cracks, such as an oversize or chipped out hole around a drain pipe running through a basement wall, hydraulic cement is a more appropriate repair product than epoxy.
Philip Schmidt writes for Networx.com.
Updated May 24, 2018.


Looking for a Pro? Call us (866) 441-6648

Concrete Average Costs
Concrete Contractors Experiences

Can You Trust Your Contractor? Here’s A Surefire Test

Concrete Storage Pad And Sidewalk, Built Fast And Well For A Fair Price