How to Remove Z-BRICK
.") Thirty to forty years ago Z-BRICK was considered a wonder product. When I was a kid I remember seeing TV commercials for it. Simple and boring plain walls could be magically transformed into beautiful brick in just a few hours as a DIY project. Well, I guess beauty is in the eye of the beholder; I was never a fan of this fake brick. Now, as a remodeling contractor in the Denver area, I have been brought in to update many of these improvement projects.
Thirty to forty years ago Z-BRICK was considered a wonder product. When I was a kid I remember seeing TV commercials for it. Simple and boring plain walls could be magically transformed into beautiful brick in just a few hours as a DIY project. Well, I guess beauty is in the eye of the beholder; I was never a fan of this fake brick. Now, as a remodeling contractor in the Denver area, I have been brought in to update many of these improvement projects.
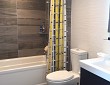
What is behind your Z-BRICK?
I have removed Z-BRICK from just about every surface available except paneling. Fortunately those two 1970s design elements rarely coexisted. By far the most common install has been on basic drywall. If you think you can remove the bricks and retain the drywall you will be sadly disappointed. However, drywall is pretty cheap and easy to reinstall (do it yourself or call a local painting contractor to replace the drywall) and you will be much better off by just “letting go.” Most Z-BRICK walls were “accent” walls, so the overall scope is normally not that big.
Trying to pull the bricks off results in removing great chunks of the wallboard. The adhesive used back then was pretty good; after all these bricks have been firmly attached for the last 30 years. The best method is to remove the bricks drywall and all -- cut a small hole in the wall, grab the back of the drywall, and simply pull it off in chunks. Once the hole opens up, it gets easier. The only real concern is the corners, where you may need to cut the drywall with a utility knife to prevent tearing on the adjacent walls.
Once the wall has been stripped to bare studs, new drywall is installed and you're back into the modern age.
Non-drywall installs
If your Z-BRICK was installed over something a bit more substantial, like a cinder block wall, you're going to need a bit more than a utility knife and some brawn. Here I like to use my trusty air chisel. An air chisel is like a baby jackhammer that you can hold with one hand. Powered by a basic air compressor, it makes cool baby jackhammer sounds and dust -- lots of dust -- and some debris. KEY TO SUCCESS: Mask or tarp off other areas of the room, as the pieces will fly. Safety glasses and gloves are also a must. Some of these bricks will come off intact, others in many pieces.
Set the tip of the chisel at a low angle along the edge of the brick. A simple squeeze of the trigger does all the work. Once the bulk of the material is removed, you can “dress” some of the high spots of adhesive with the blade of the chisel as well. An air chisel is not a pricey item (I got mine for about $45) and will save you lots of time over the hammer and chisel method. An alternative would be an electric hammer chisel if you already own one of those.
Next, install drywall
Once the brick is removed from these “solid” walls, you can install drywall over the brick using adhesive, or go the more common route and install some attractive tile or natural stone product. In the case of new tile or stone installations, the wall does not need to be perfectly smooth as the new mortar will cover the minor dips and bumps. Say goodbye to the 1970s.
Updated February 6, 2018.


Looking for a Pro? Call us (866) 441-6648

Remodeling Average Costs
Remodeling Contractors Experiences
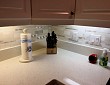
Beautiful Tile Backsplash Completes Our Kitchen Remodel
Can’t Find A Prefab Shed You Like? Try Custom Carpentry Instead