How To Lay Wall Tiles
 Wall tile is trendy … that’s for sure. It’s both practical and luxurious for kitchens and bathrooms. In fact, good-looking tile can add a fashion-forward note to just about any wall in your home. While hiring an experienced tile contractor is a safe bet, if you have plenty of time and patience, you might want to learn how to lay wall tiles yourself. Take a peek at our simple, yet detailed guide on "How to Lay Wall Tiles 101."
Where To Use Wall Tile
- Backsplashes
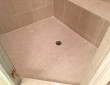
- Walls of shower area or entire bathroom
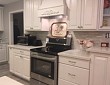
- Kitchen walls
- Anywhere you want a bright note of color and/or texture
CAUTION: Be careful about using wall tile as a flooring material. Ceramic wall tiles often just aren’t tough enough to stand up to foot traffic.
Which Surfaces You Can Lay Wall Tiles On
- Unpainted drywall
- Painted walls
- Plaster
- Cement backer board
- Existing tile (though you must make sure that your walls are strong enough to support the weight of a new layer of tile)
Do NOT install tile on top of plywood, wallpaper, highly glossy surfaces, or lead paint.
Supplies You'll Need
Tiles
Thinset or tile adhesive
Graph paper of tile design software
Degreaser or sander
Backer board and waterproofing membrane for bathroom tile
Painter's tape and newspaper
Notched trowel
Plastic spacers
Tile cutter, wet saw, or glass cutter
Grout
Rubber float
Sponge
Sealant
How To Lay Wall Tiles
- Purchase your tiles. To calculate quantity: Measure the total wall surface you’ll be covering and add about 5-10 percent to allow for breakage. You might want to keep a few extra tiles on hand for future repairs as well.
- Plan the tile layout. Start from the center of your wall, rather than a corner. Sketch the layout with graph paper or tile design software, especially if you are working with several types of tile or a complex pattern. Include all large features – for example: door, windows, vanity, tub, etc. Allow for the thickness of grout lines.
- Prep the walls. They should be undamaged, smooth, clean, and dry. Scrub existing tile with a degreaser. Sand painted surfaces. Install water resistant material such as cement backer board, topped with a waterproofing membrane, if you are going to be tiling your bathroom wall.
- Prep the room. Switch off your power at the electrical panel. Remove any outlet covers and switch plates on the wall(s) being tiled. Protect mirrors, countertops, etc. with painter’s tape and newspaper.
- Mark your starting point(s). With a carpenter’s level and a chalk snap line, mark a vertical line at the center of each wall to be tiled. Then intersect that line with a horizontal where the top of your base row of tiles will be laid.
- Apply thinset or tile adhesive. Cover just one small area (approximately 3’x3’) at a time. Be sure not to hide your reference line. Make grooves in the adhesive using a notched trowel.
- Attach your first tile. A slight twisting motion will help embed the tile into your adhesive. Check that the tile is level, according to your reference line. Work quickly; if the patch of adhesive begins to harden, moisten it lightly.
- Tile the entire wall. Install tiles from the center, moving outward and continually checking that everything is level. Plastic spacers will ensure that the gaps between tiles (where your grout will go) are even; leave them in place until your adhesive dries.
- Take care of the edges. Apply a tile border, if desired. Cut the last vertical row of tiles to size as necessary with a tile cutter, wet saw, or glass cutter.
- Prepare for grouting. Sponge off excess adhesive once you have tiled the whole wall. Let adhesive dry for 24-48 hours before removing the spacers.
- Grout. For easier cleanup, moisten the tiles first. Prepare grout according to manufacturer’s directions – or use premixed. Trowel grout onto tiles and work into the gaps with a rubber float. Grout in 10-square-foot sections. Remove excess from the tile surface with your float, then wipe with a clean, damp sponge.
- Dry and seal. Leave the grout to dry for 24 hours. After that, apply sealant to the grout lines (keep it OFF the tiles themselves).
If you’d like help with your wall tiling project, hire a reliable, experienced tile contractor.
Laura Firszt writes for networx.com.
Related Articles


Looking for a Pro? Call us (866) 441-6648

Related Experiences
My Remodeled Bathroom Is Modern, Clean And Beautiful
Grout Replacement Made My Shower Look Brand New