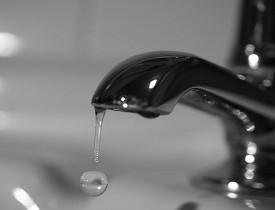
How to Fix a Leaky Faucet
 More than 9 times out of 10, a leaky faucet is caused by a little rubber seal inside, such as a washer or O-ring, which has worn out from use. If this is the case, DIY faucet repair is a simple matter of replacing the worn-out seal. Just keep in mind the two most important rules about fixing faucets: 1) use exact replacement parts, and 2) pay attention (and maybe snap a couple of photos) when taking apart the faucet so you can put it back together in the same way.
Follow these steps for DIY repair of a leaky faucet:
Identify the Source of the Leak
If water is dripping from the faucet spout, the problem is in the faucet handle (or more accurately, the valve the handle controls). Feel the water coming out to see whether it’s hot or cold. If it’s a two-handle faucet, hot water dripping indicates the “hot” handle needs a repair, and cold indicates the “cold” side is bum. You can choose to fix just the one side, but often it’s best to do both, since the other side is likely to be on its last legs anyway. With most single-handle faucets, it doesn’t matter if it leaks just hot or cold; you’ll be accessing both sides at the same time so it makes sense to replace all of the seals.
If the leaky faucet has a movable spout, like all kitchen faucets have, and the plumbing leak is at the base of the spout, it’s probably the O-ring(s) sealing it to the faucet body and not a bad handle valve. However, since you have to disassemble the faucet to replace the O-ring(s), you might consider replacing the handle valve parts while you’re at it.
Remove the Handle and Valve
VERY IMPORTANT: Turn off the hot and cold water supply to the leaky faucet by closing the shutoff valves under the sink—that is, turn the little football-shaped handles to the right until they stop.
Open the faucet handles to release any trapped air or water. Expose each handle screw by prying off any decorative (“H” or “C”) cap with a screwdriver. If there’s no cap, look for a setscrew on the side of the handle. Unscrew the handle, then lift it off and set it aside.
Your faucet valve will be one of several different types, including a metal spindle (compression type), a plastic cartridge or disc, or a ball covering two holes integrated into the faucet body. In any case, it’s probably held in place by a threaded cap or nut and may be underneath an additional plastic cover or secured farther down on the body by a retaining clip. Take a moment to examine the fastening parts, then remove them using a screwdriver and/or tongue-and-groove pliers. Remove or disassemble the valve to access all of the seals.
Find Replacement Parts
Rubber seals, springs and other replaceable valve parts may be sold together as a kit (from the faucet manufacturer or an aftermarket supplier). Identifying the right parts by model number or written description may be difficult, so it’s best to find the part that looks exactly like the one in your hand. This means you have to bring all of the parts with you to the hardware store or home center.
Washers, O-rings and other rubber seals are also sold individually or in assortment packs. With cartridge and cylinder-type valves, often it’s best to replace the whole cartridge or cylinder, if available, plus any additional seals or springs.
Reassemble the Faucet
Put the faucet back together in the reverse order of the disassembly. Don’t force anything; if a part doesn’t seem to fit, it’s probably not aligned properly. Cartridges often have a little plastic tab that fits into a notch on the faucet body. For some seals, particularly O-rings that seal spouts, it’s a good idea to coat the rubber with a small amount of waterproof/heatproof grease to ensure smooth motion.
With the faucet completely reassembled, open the handle(s) all the way, then slowly open the shutoff valves on the supply lines. The faucet might sputter as air passes through it, so be prepared for loud noises (this blast of air can damage some faucets, which is why you open the handle valves first). Once the water is flowing, turn off the handles to test the repair.
If you'd prefer to skip the DIY, hire a reliable, licensed plumber to fix that leaky faucet for you.
Updated February 20, 2018.
Looking for a Pro? Call us (866) 441-6648

Plumbing Average Costs
Plumbers Experiences

A Plumber To Install A Water Heater When My Old One Flooded The Garage

Our Kitchen Faucet And Pipe Replacement


