Cracked Tile Repair Tips
Discovering a broken tile in your home is always a bit of a bummer, even more so if you do not have any extra tiles left over from the original installation. When I complete a tile project for a client, I insist that he keep a few of the leftover tiles, just in case. If we do not have any left, I recommend ordering or buying a few right away, as they may not be available in 5 years or so, or you may not remember what style, part number or color was used down the line.
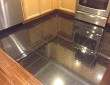
Some tiles get cracked due to poor installation combined with normal wear and tear. Other tile damage is due to some type of accident. A 10-pound cast iron skillet falling a few feet can do serious damage to your tile.
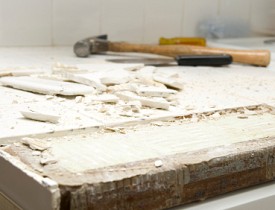
Goodbye Broken Bits
The first step to cracked tile repair is the removal of the damaged surface. Once a tile is cracked or broken, it is often pretty easy to remove. A screwdriver or stiff putty knife can normally be used to dig out whatever you can't lift out with your fingers. It's a good idea to wear gloves and safety glasses for this, as pieces will fly and they are very sharp. I have gotten a few cuts pulling out tile bits, and excess blood on your tools never makes a project go smoothly. If the tile is being stubborn, a small cold chisel can be used to break up the tile and grout. Work your way from outside in to avoid damaging more tiles and requiring further tile chip repair.
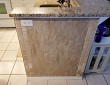
Set New Tile and Grout
Having cleared out the old broken tile, adhesive and grout, the next step to cracked tile repair is to set the replacement tile and grout around it. Having planned ahead when the original tile was laid, your extra tiles and your note about what color grout to use will provide a seamless replacement and simple cracked tile repair.
Widespread Damage
If the broken tile was due to an accident, then chances are good that the substrate that the tile was attached to is still in good shape, and you can proceed with a simple replacement to complete your tile chip repair. Other tile cracks and failures can be due to the collapse of the "backer" or substrate. I have seen this often in bathrooms where water plays its dirty tricks and rots away the drywall or sub-floor behind the tile. For these issues, you might want to just go fishing, since you've opened a "can-of-worms." That type of cracked tile repair project often needs large scale or expert help.
New Tile and Old Tile
If you do not have extras of the same tile, you can still proceed. The plan has changed a bit, but it's not the end of the world. Think of this as a design opportunity. Tile entryways often see more damage than other areas in a home; here, minor design changes can add a little style. Instead of replacing the broken tiles with identical tiles, get some different ones and create a pattern in one area to complement the rest of the space.
Knowing how to replace cracked or chipped tiles is a nice skill to have in your knowledge toolbox. You can do it the easy way with an exact match for tile and grout, or the more challenging way with new patterns and colors. If your tile trouble runs a bit deeper, however, with failed substrates or backers, then that fishing pole in the garage may see some use after all. After your relaxing day bringing in the catch, you will have the strength and willpower for that more involved "can-of-worms" project that may lie before you.
If you need more advice on fixing wall tiles, read here. If you're not sure whether to calls someone about your bathroom tile problems, read this handy guide. Once you've fixed your tile problem, be sure to keep your surface in good shape for the future through proper tile maintenance.


Looking for a Pro? Call us (866) 441-6648

Tile Contractors Experiences

The Most Important Quality In A Tiler? Attention To Detail
Outstanding Tile Installation Based On My Own Design