Vermiculture! (That's composting with worms.)

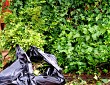
Photo credit: Steve Graham (the author, tending to his worm compost)
"Vermiculture" means raising worms for fishing or vermicompost. And "vermicompost" is a fancy word for worm poop (or castings, to be more precise and polite). Worms eat all the slimy, furry bacteria, fungi, and other microorganisms that grow in decomposing fruits and vegetables. In turn, they produce castings, which are mostly bacteria, fungi, and other organic materials, in the form of an odorless soil supplement that feeds plants and retains water in the dirt.
Worms can turn your fruit and vegetable scraps into a good soil improvement mix for your garden. You can easily become a worm rancher and grow your own worm compost. All you need is:
- garbage
- newspapers
- worms
- and a box.
Where to Get Worms
Compost worms are called Red Wigglers, a different type of worm than a fish-baiting Night Crawler or the earthworms that crawl onto sidewalks after rainstorms. Check your area for a worm farmer who can show you some tricks and sell you some worms. You can also adopt worms from a neighbor who already has worm compost. The critters multiply quickly, and anyone with worm compost will have plenty of worms to share. Otherwise, buy worms online.
How to Make a Worm Compost Bin
1. Prepare your worm house.
Drill breathing holes for the worms in the bottom and sides of the container. Put something under the container that allows drainage but captures the liquid. Then add plenty of moist shredded newspaper or cardboard for bedding. Put the worms in with some dirt to make them feel at home.
2. Add food.
Feed worms almost anything that came out of the ground -- fruit and vegetable peels, cores, spoiled produce, moldy bread, etc. Just don't put in any vinegar, oils, meat, or bones (egg shells are OK).
The best method is "pocket feeding." Mentally divide the container into four or five segments, then bury a small amount of food in one area. Some worm farmers mark the spot with a popsicle stick. Every few days, add food to each successive segment. Hopefully, much of the food will be gone by the time you make it back to the first area.
The other method is simply spreading the food on top of the worms, and adding a layer of shredded newspaper.
3. Clear out the compost.
Be patient. The worms take a while to make a significant amount of compost. After a couple of months, tip the compost bin onto a plastic sheet under bright sunlight. Pile the compost into a cone and slowly skim off the crumbly dirt-like compost. The worms will dig down away from the light, so you can remove the useful compost and keep your worm farm alive.
4. Finally, add the compost to the garden to help your vegetables grow.
After harvesting the veggies, feed the scraps to the worms and start over again with vermicompost, a great way to help your garden and reuse some of your kitchen garbage.
For expert assistance with all your gardening projects, contact a landscape professional.


Looking for a Pro? Call us (866) 441-6648

Landscaping Average Costs
Landscapers Experiences
Yard Cleanup And Lawn Care Service With A Great Work Ethic
Lawn Repair: Contractor Followup To My DIY Prep Got The Job Done