Sealing Your Tiles Right
 The old tile is gone, the shower was stripped to bare studs and new cement-based backer board installed. On top of that, your tile contractor set and grouted new tile. So you think you're done, right?
Well — almost. The final step that will help keep things cleaner and free of mold is the application of a grout and tile sealer. After all, why invest in new backer board and new tile if it will get damaged by water and mold? Protect your home by sealing your grout and tiles.
Types of Grout and Tile Sealers
Grout and tile sealers fall into 2 basic categories: penetrating and surface types. Nearly all commonly available sealers are penetrating types, and are usually water-based. The “active ingredient” in these sealers most often is a glycol ether solvent and copolymer compounds. These polymers are what give a sealer its resistance to stains and discoloration.
Another product often used as a sealer is a stone enhancer. This product is silicone-based and is often utilized to add depth of color or provide a “wet” look to natural stone. As a side benefit, these silicones are highly water-repellent. I have used them on granite and marble with very pleasing results. Enhancers are more likely to darken grout, so if you choose to use this type of product, I recommend that you test it first in an inconspicuous area.
Proper Application
Since application techniques vary by manufacturer, check application guidelines on the product you are using. Apply the grout and tile sealer to clean, dry surfaces only. In new construction, grout should “cure” for 48 to 72 hours before the sealer is applied. Even if you are sealing old work, be sure that the surface has been dry for 48 to 72 hours. Most ceramic or porcelain tiles are glazed so the tile itself is pretty robust and waterproof. The exception here may lie in primitive handmade “art” tiles, or natural Saltillo tile.
Freshly applied sealer will penetrate grout readily, and after a few minutes be sure to wipe away excess. Excess sealer that dries on the tile edges can lead to a sticky mess, and the only real cure is to use an aggressive stripper to remove it. This cleaning action then removes sealer from the grout line, so the whole process needs to be performed again.
Long Term Care
Most sealers are applied every 1-2 years, though some manufacturers claim lifespans on their products of 15 to 20 years. Daily maintenance of your tiled surfaces, especially in the bathroom, extends the lifespan of your grout and sealer.
In the majority of homes, the most troublesome area for moldy or dirty grout is in the shower. Here the constant bombardment with water, combined with the “food” of soaps and shed skin cells, provides fertile ground for mold growth. Many folks squeegee or dry their showers after every use. By doing so, they remove the water from the growth equation and their showers look brand new year after year.
When cleaning your shower, use cleaners that are pH neutral. The acidic nature of vinegar and other common cleaners will erode the cement base of grout over time, which weakens it and may cause its early demise.
An Insider Hint
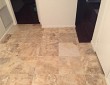
For tile floors, choosing a grout color that matches the dirt of your neighborhood is one of the best ways to keep grout “looking” clean.
Updated May 3, 2018.


Looking for a Pro? Call us (866) 441-6648

Cleaning Services Experiences

Bathroom Tile With Outstanding Attention To Detail
New Kitchen Floor Tile After Water Damage
