DIY Plumbing: How to Replace a Kitchen Sink Sprayer
 For a few days, I couldn't figure out why washing dishes and vegetables in the kitchen sink caused water to leak out of the under-sink cabinet. I moved all the cleaning supplies, trash bags and miscellaneous debris from the cabinet and couldn't see any problem. I turned on the faucet and let the water drain. Nothing.
Then I tested the handheld sprayer attachment and found my culprit. The hose had sprung a leak and was spraying water into the cabinet whenever I was spraying water into the sink.
I'm usually more of a "patch it" guy than a "scratch it" guy. I hate to spend money and throw something out when duct tape can fix the problem. In this case, I could justify the minimal expense and the small amount of material involved in buying a new sprayer. It seemed more sensible than taping over the hole again every couple of weeks.
I wanted to buy just the hose, but my local Denver home improvement store only carries the whole $13 replacement set (strangely, you can buy the spray head separately for $8, but not the hose).
Replacing a kitchen sink sprayer is a good DIY plumbing starter project. It's very straightforward and hard to mess up. The only thing that can go wrong is not turning off the water before detaching the hose. Even then, you probably won't recreate the slapstick movie scene where the gusher sprays up in the clumsy oaf's face. You'll just have a steady stream pouring down and reminding you to turn off the supply lines.
Anyhow, turn off the water supply lines for the kitchen sink and find the attachment for the sprayer hose. It should be right under the main kitchen faucet. You may need a wrench to unscrew the hose. Keep a bucket handy to drain the hose.
You may have to remove the sprayer base to get the hose out of the sink. It is held in place by a nut underneath. Just take it all out and start fresh. The replacement sprayer set comes with a new base.
You may be able to find several colors or models of sprayer, but they all use the same size and type of attachment. I was able to upgrade from white plastic to classy chrome plastic that matches my sink.
Connect the sprayer head parts and thread the new hose through the sprayer base. Then reattach the base nut. It only needs to be finger-tight. Then pull the hose back down into the cabinet and reattach to the sink.
I had to reattach the hose twice because I didn't straighten it, and there was a loop in the hose preventing the sprayer from reaching all the way across the sink. I guess I had found the second thing that could go wrong in replacing a kitchen faucet sprayer, but it was still a very simple DIY plumbing project.
Photo credit: Steve Graham


Looking for a Pro? Call us (866) 441-6648

Plumbing Average Costs
Plumbers Experiences
Cast Iron Bathtub Replacement Was Definitely Not A DIY Project
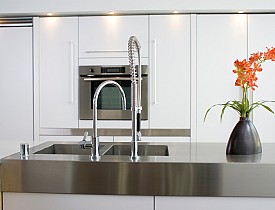
Kitchen Faucet Replacement With A Unique New Feature