How to Repair a Sink Pop-up Drain
 If you’re like most homeowners and have resigned yourself to a poorly working stopper in your bathroom sink, you’ll be amazed to see how easy it is to fix. Once you understand the basic system, you’ll become master of your lavatory and will never again have to live with a sink that won’t hold water or, if you have the other common problem, a sink that takes forever to drain.
How a Sink Stopper Works
Got your flashlight? Now clear out the vanity under the sink so you can get a good look at the rear, underside of the sink and the faucet. The stopper handle (or knob) at the back of the sink is connected to a vertical metal rod. When you push down or pull up the handle, the handle rod moves a horizontal pivot rod below. The pivot rod actually runs through the wall of the sink’s drainpipe and is connected there by a special retaining nut that keeps the joint watertight. Inside the pipe, the pivot rod is inserted into a loop or hook on the bottom end of the stopper. The handle and its rod make the pivot rod move like a seesaw to lift or lower the stopper at your command.
Adjust the Stopper Level
If your sink won’t hold water, chances are the stopper isn’t seating securely over the drain hole, or there could be leakage due to a bad stopper gasket. If the sink won’t drain quickly, the stopper either isn’t opening far enough or the drain is partially clogged. For the first problem in both cases, adjusting the stopper level is the first thing to try: Under the sink, locate where the rear end of the pivot rod attaches to the vertical rod of the stopper handle. There should be a flat, metal bar with several holes in it (called a clevis), or the rods may connect to each other with an adjustable fitting or clamp.
To make the stopper rise up higher when open, squeeze the bendable clip holding the pivot rod to the clevis, then slip out the pivot rod and move it down a hole or two on the clevis. To make the stopper close more tightly, move the pivot rod up a hole or two on the clevis. If there’s no clevis, simply loosen the fitting or clamp joining the rods and move the pivot rod up or down on the handle rod as applicable. Finetuning this adjustment often takes a little trial and error.
If this hasn’t solved your problem, it’s time to remove (and possibly replace) the stopper.
Remove (and Replace) the Stopper
To remove the stopper, make sure the sink is empty, then loosen the retaining nut securing the pivot rod to the drain pipe, using slip-joint or standard pliers. Unscrew the nut all the way, then slowly pull the pivot rod backward while lifting up on the stopper. Once the stopper is free, you can return the pivot rod to its normal position.
If the stopper and/or drain are gunked up with hair, etc., clean them, then reinstall the stopper by reversing the removal steps. Note: Tighten the pivot rod’s retaining nut (or cover the hole in the drain pipe, if you removed the rod) before running water in the sink.
If the rubber gasket on the underside of the stopper top is cracked or funky, replace the stopper (or you can try to find a new gasket, if you can’t find a stopper with the right finish). Replacement stoppers are commonly sold at home centers and hardware stores.
When everything is back in place, and you’re sure the stopper is captured by the pivot rod, tighten the pivot rod’s retaining nut so it’s snug enough to be watertight, but do not overtighten, which can hinder the pivot action. Run the water and check for leaking around the nut.
If you'd prefer to hand this task over to a professional, find a reliable plumber to take care of it for you.
Updated February 8, 2018.


Looking for a Pro? Call us (866) 441-6648

Plumbing Average Costs
Plumbers Experiences
Emergency Plumbing Repair Of Collapsed Sewer Pipe
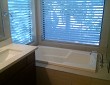
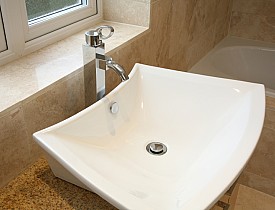
A Modern, Nice-looking Bathroom Remodel Also Adds Value To Our Home