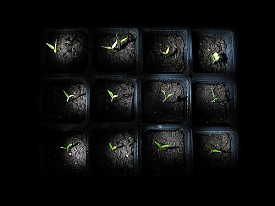
Gardeners, Start Your Seedlings
 Spring is springing, y'all, and it's FINALLY time to start your seedlings for your Cleveland garden if you haven't already. You want to get things going as soon as possible so you can transplant and start enjoying your own home-grown produce; why waste any more money at the store, right? Whether you're gardening for the first time or entering your fiftieth year, the seed packets are a-callin'...
Here's what you need: seeds (well, obviously), good sterile soil (to prevent diseases that might harm your baby plants), planting trays (more on this in a minute), and, well, YOU!
You can get fancy with things like heating mats (to help keep seeds toasty so they'll germinate) as well as special tools and additional fertilizer, but for basic seeds, the above should cover you. Start with containers. You can use planting trays, packs, or other commercial products, but things like recycled egg cartons, yogurt pots, and other containers work just fine too. The main characteristic they should have is good drainage, ensuring that your seeds don't get damp and moldy.
Garden suppliers are a great source of sterile potting soil for you to use -- and by "sterile," we don't mean in the operating room sense. It's fine if it contains beneficial microorganisms like fungi, as long as it doesn't have harmful ones that might infect your growing plants. Seedlings are vulnerable, and the time to work compost and other fertilizers into the soil is later, when they're more established and you're prepping your beds for transplants.
Measure out your soil and establish a pattern for planting. Remember that you will be thinning and transplanting, but you still don't want your seeds too close together. It can help to use a large mesh screen as a planting guide to help you keep seeds evenly spaced in a big seed tray -- if you're using containers, put in one to three seeds depending on germination rate and recommendations on the package, and prepare to thin and they grow.
Some seeds germinate better than others. Lettuce, for example, tends to go wild if it's happy where it is. Beets, on the other hand, can sometimes be slow and a little obstinate. Give your seeds up to ten days to start sprouting before you give up and try again, because sometimes they need a little time to come out into the big bad world.
Meanwhile, keep the soil moist but not soaking, and position your seed trays somewhere warm but not excessively hot. Trays near a window or radiator are a great idea. You don't want to bake your seeds, but you do want them to think the sun is shining and spring is fully in gear so they'll sprout. If you have curious pets, make sure to keep your seedlings up high to avoid disasters...but remember, cleaning companies are happy to come in and help with a little soil ground into the carpet if the worst happens.
Watching seedlings grow can be immensely satisfying, and it's a good idea to take notes in your garden notebook as they go so you have a reference for future news. Make note of when they sprout and how long it takes them to put out additional leaves. As they grow, you'll be transplanting them into larger and larger containers until they're ready for the big day...when they're transplanted to the wonderful world of the outside garden!
Don't have seeds yet? Check out Seeds of Change, Baker Creek, and Seed Savers for fantastic organic and heirloom varieties.
Katie Marks writes for Networx.com.
Looking for a Pro? Call us (866) 441-6648

Landscaping Average Costs
Landscapers Experiences

Rock Landscaping Adds Curb Appeal To An Arizona Home

New Low-Maintenance Landscaping To Update Our Yard


