How to Fix Rattling Windows
If you've got rattling windows, you already know how loud and annoying they can be. A loose pane of glass or sash is enough to cause most windows to rattle anytime it's windy or a heavy truck rumbles past the house. On top of that, cold outside air may be leaking into your home, which will cause you to spend more to keep it warm. Here's how to stop those windows from rattling and save on your energy bill too.
Loose Glass
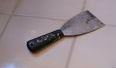 If the glass is loose, you'll need to caulk it up. The caulk will secure the glass and make it airtight. Apply the caulk to the cracks between the glass and the sashes. Use a putty knife (pictured) or the edge of a credit card to maneuver the caulk into the cracks. Make sure the cracks are completely filled. Soak a rag in vinegar and use that to wipe away any smears of caulk that may have found their way onto the glass while you were caulking.
Loose Sash
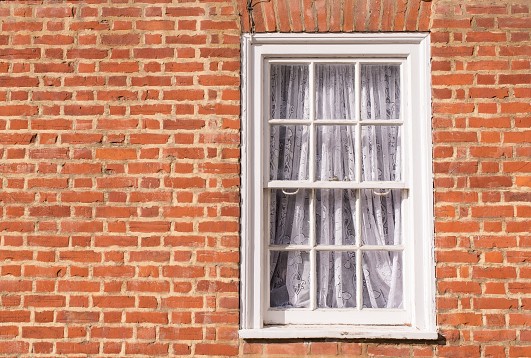
 As wooden window frames age, they may warp or wither due to weather. This may cause the sash to no longer fit properly in its track, which causes the window to rattle. To clarify, the sash is the part of the window that actually holds the glass and is able to slide up and down on a track. (Pictured: A double-hung window with a wooden frame.)
Weatherstripping will secure the rattling window and make it airtight. There are various kinds of weatherstripping and you should ask the professional at your local home improvement store which material - vinyl, plastic, metal, rubber, foam, or felt - is the best for your needs. Most weatherstripping either needs to be nailed into place or comes with an adhesive backing that can be stuck on like tape. Obviously, self-stick weatherstripping is much easier to install, but it doesn't last as long as the nail-on weatherstripping and it really won't last if used on the parts of the window that slide against each other. A few well-placed nails after sticking the weatherstripping in place should solve that problem though.
Installing Weatherstripping
For double-hung windows, metal nail-on weatherstripping is recommended, but it's quite difficult to install. In the spirit of simplicity, the installation detailed below involves using self-stick plastic V-strip weatherstripping, which is also highly effective.
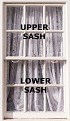
- Chip away any flaky paint, then use a soapy cloth to thoroughly clean the upper and lower sash and jambs. Wait until everything's dry.
- Measure the bottom of the sash and cut three pieces of the V-strip weatherstripping to size.
- Peel off the adhesive backing and press one piece onto the bottom of the lower sash, another piece onto the top of the upper sash, and the third piece (with the opening of the V facing downwards) onto the bottom of the upper sash - meaning, when the window is closed, the V-strip will end up wedged between the outer part of the lower sash and the inner part of the upper sash (also called the "meeting rail").
- Measure the V-strip so it's the same length as the side of the sash and cut to size. Do the same thing for the other side of the lower sash and for both sides of the upper sash.
- Open the lower sash all the way. Peel off the adhesive backing of the first piece and firmly press the V-strip into the track. Gently hammer the weatherstripping to the jamb with finish nails to make sure it won't unstick once the sash is sliding up and down. Do the same thing for the other side of the lower sash and for both sides of the upper sash.
Hopefully, your rattling windows are now a thing of the past and you're beginning to enjoy the benefits of windows that are more energy-efficient.


Looking for a Pro? Call us (866) 441-6648

Handyman Average Costs
Handyman Services Experiences

New Asphalt Roof For My House And Shed After A Storm Blew Off 21 (!) Shingles

Garage Roof Leak Repair Means No More Dripping Onto My Drywall