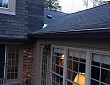
How to Install Soffit Vents for Your Roof

Installing soffit vents can be a simple DIY project which only only requires a few steps. Soffit vent installation involves cutting rectangular holes in the soffit and then screwing the vent over the hole. Soffit vents should be installed directly under the eaves. If you are a seasoned DIYer, expect the installation to take about two hours. For beginners who do not know how to install soffit vents, it could be as long as four hours. If you are unsure whether you can handle soffit vent installation on your own, then find a roofer who can help you.
Why Soffit Vents Are Necessary
Soffit vents help even out the ventilation necessary for keeping a roof functioning properly. A continuous flow of air in your attic will help extend the life of your roof. Installing soffit vents is particularly important, as it will increase the airflow under your roof. This will help alleviate ice dams and attic condensation in the winter. Ice dams are common in snowy northern states such as Minnesota. Installing soffit vents will also help reduce heat buildup in the summer, and save you money on air conditioning. Soffit vents let cool, fresh air into your attic, while roof vents exhaust the hot, humid air. Most roofers recommend installing a roof vent for every soffit vent installed.
How Many Soffit Vents Are Necessary?
The first step in determining how many soffit vents are needed is to contact your city to learn the local building codes and find out how many soffit vents you need to install. City building codes often outline the number of soffit vents needed for residential roofs. As a general rule, you need at least one square foot of intake vents (soffit) and one square foot of exhaust vents (roof vent) for every 150 square feet of ceiling.
Types of Soffit Vents
Soffit vents are just one of the types of vents located in and around your roof. Some of the other vents around the roof include dormer vents, ridge vents and gable vents. Vents are made in several shapes and sizes including square, octagon and circular. There are several different types of soffit vents available including continuous, circular and perforated vents made for vinyl siding. Continuous soffit vents can be installed to run the entire length of your soffit. Circular vents range from 1" to 8" in diameter. Circular vents are installed by drilling holes in the soffit and pressing the vent into the hole.
How to Install Soffit Vents
Before you begin, make sure to have the following protective gear: gloves, mask and glasses. You will need the following tools: Ladder, drill, cardboard, nail, hammer and saw.
1. Go into the attic and locate the area where you will be installing the soffit vents. Mark the area and then drill a hole on the mark. Alternatively, you can hammer a nail through the soffit.
2. Make a template of the soffit vent out of cardboard, with a hole directly in the center. The template should be one inch smaller than the actual length and width of your vent.
3. On the outside of your home, place a ladder just below the eaves. Center the template over the hole that you made from inside the attic. Trace around the template. Wearing safety glasses, cut out the traced outline with a saw.
4. Install the vent by placing it over the opening. Nail or screw the soffit vent into place.
Updated April 25, 2018.


Looking for a Pro? Call us (866) 441-6648

Roofing Average Costs
Roofers Experiences

Come See My New Metal Roof! It Is Fantastic!
Repairing Our Roof Valley Stopped A Leak From Getting Worse
