How to Wire a Chandelier

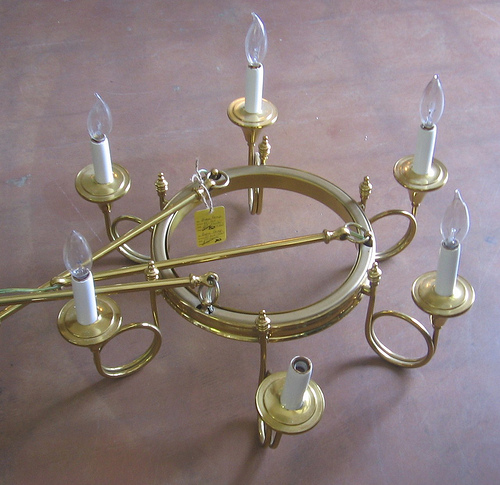
Photo of brass chandelier by TheLivingRoominKenmore/Flickr.
Chandeliers are big, heavy and expensive, so DIY installation can look pretty scary. You can do it, though. Just breathe deeply, count backwards from ten, and follow my instructions. These instructions apply to most styles of chain-hanging chandeliers. For this installation, I’ll assume you are replacing an existing fixture.
- Un-box your new chandelier and confirm that all of the components are included and undamaged. It’s a drag to get halfway through a project only to find out that something critical is missing.
- Once you’ve confirmed that everything is in order, remove the existing fixture. To keep all of those electrons safely held at bay, turn off the power at the breaker box. Using just the wall switch can be tempting, but go the extra distance for this.
- Depending on the style of the previous fixture, there are a number of different configurations possible to access the internals. A lot of fixtures are held in place by a hollow threaded tube, with a nut on the end to keep it all together. Once the nut is removed, the parts can be taken off in sections. When the wires are finally exposed, unscrew the wire nuts to remove the light’s leads. There should be 3 wires: a green or “naked” ground wire, a hot (black) wire, and a neutral (white) wire. Most lights will have thinner stranded wires for these leads.
- After the old fixture is removed, install the mounting bar and hanging hoop. These are normally affixed with a pair of machine screws into the electrical box. These screws hold the entire weight of the new fixture, so tighten them completely.
Safety tip: If your new chandelier is big and heavy, be sure your ceiling box can handle this weight (check your instruction sheet for details). While some simple chandelier designs are lightweight and can be hung from a basic remodel box set in drywall, larger heavy chandeliers will require heavy-duty hooks or steel junction boxes firmly attached to framing members. Nothing will disrupt an evening more than many pounds of glass, wire, and steel crashing down on your head due to a wimpy install.
- Determine the length of the chain for a pleasing height. You can hold the fixture in place for this or take measurements. Adjust your chain to the desired length. The best way to open a chain link is with 2 pairs of pliers. Instead of “stretching” the link to open it, just give it a twist to separate the sides. This method is much better for closing the link later, when the link will be bearing weight.
- When you have the length correct, weave the wiring up from the lamp to the end, skipping every few links.
- Slide the cover plate and its attachment nut down the wire and chain combo to the fixture. This is one step that often gets forgotten until the end … and results in having to re-wire.
- Hang the chain onto the hanging loop and close the link back up with your pliers.
Safety tip: The cost-to-weight ratio of most large chandeliers is dramatic. The upper limit that I can hold for a few moments overhead with one hand is a bit over 20 pounds. Don’t risk of dropping hundreds (if not thousands) of dollars’ worth of lighting; take the extra preparation needed for a safe and efficient install.
Remember that tall spaces require the use of big ladders or in extreme cases, a portable scaffold. A lot of these larger units have a mechanism that allows you to relieve the weight of the unit with a hook, chain or wire while you make the electrical connections. Otherwise, get a buddy to help. Or hire a professional electrician to take care of the installation.
- Trim the light’s supply wires to an appropriate length and strip the ends. Connect the fixture ground wire to the naked ground wire in the box, or to the grounding screw on the hanging bar.
- Twist the fixture’s black wire onto the black supply wire and secure with a wire nut.
- Twist the fixture’s white wire onto the white supply wire and secure with a wire nut. Tuck the wires into the box, slide up the decorative cover plate, and secure the attachment nut.
- Install the bulbs and shades, turn on the breaker, flip the switch, and enjoy!
Old chandelier designs using candles were often mounted with a pulley and rope that allowed the chandelier to be lowered for lighting and extinguishing or -- in the case of many swashbuckling action movies -- dropped on the villain’s head with the swipe of a saber. Today we don’t see too many people swinging from chandeliers, or dropping them on their enemies; they merely provide elegant lighting and a touch of class.
Updated November 18, 2018.
Looking for a Pro? Call us (866) 441-6648

Electrical Average Costs
Electricians Experiences

Hot Tub Installation By The “BEST” Electrician

Pool Wiring Repair Eliminates A Potential Hazard


