Exterior Painting Preparation Tips
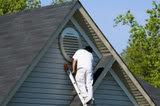
Save time and money. Take the extra time to prepare properly for your exterior painting project. Good exterior painting preparation not only helps the paint job to last longer and look better; it also prevents problems such as chipping, peeling, and mold growth. Get started on your project by reading and following the exterior painting preparation steps below. And if you just aren't up to painting on your own, then make it easy on yourself by finding a professional and reliable painter.
Step 1: Wear the Right Clothing & Safety Gear
Exterior painting preparation is a dirty, damp job, so wear clothes that you don't mind dirtying or getting wet. Protective goggles are a must for safety reasons, especially during the scraping process. Chipped-off paint and other materials could easily fly into your eyes and cause serious damage. Work gloves are also important for protecting your hands during the prep process.
Step 2: Spray the Dirt Away
It's essential to clean the surface thoroughly so that the paint will adhere properly. While some recommend using a power washer for this step, others caution that it can drive water deep into or behind wood siding or trim. If the soffit gets too wet, the wood will swell and quickly cause the new paint to peel off. Even if you don't have wood siding, it still may be a better idea to use a hose with a strong water flow rather than a power washer. For even stronger cleaning than just a hose, use a special brush attachment for the hose along with liquid soap; just make sure to rinse off all of the soap. When there are any areas with mold or mildew, it is advisable to scrub with an anti-fungal cleaner, available at hardware or home improvement stores.
Step 3: Scrape off Loose Paint
Make sure to put your goggles on before you scrape any loose paint. To be most effective, use a paint scraper, putty knife or wire brush. For stubborn paint, or for scraping multi-layered paint, consider using a heat gun or rotary paint remover. A heat gun looks like a hair dryer and reaches very hot temperatures, as high as 100 degrees Fahrenheit. Make sure to wear work gloves to protect your hands and keep the heat gun away from all fresh paint, paint fumes, paint cans or paint thinner/cleaner to avoid fire hazards. A rotary paint remover, which can be attached to an electric drill. The stiff wire tines on the rotary quickly remove large areas of paint. Take caution when using this tool, as it should never come into close contact with your body parts. Practice on a small piece of wood before working on the siding itself.
Step 4: Sand & Repair
For wood siding, fill any gouges or holes with patching compound (also known as "plastic wood"); check that the compound is exterior grade. in any area where you have removed paint, you will also need to sand the edges to help the new paint cover and hide the edge. Caulk any cracks, seams or gaps with paintable exterior caulk. It's important to be meticulous near the doors and windows so that your paint will stick properly in these tricky areas.
Step 5: Tape & Cover
This is the final step before getting into the actual painting. You will need to tape off any areas not be be painted, such as around windows, with painter's tape. (Some folks prefer not to tape around windows but rather to scrape any paint spills off with a razor blade after the fact.) Place drop cloths anywhere that you do not want paint dripping, including shrubs, bushes, porches, railings, and the like. Now let the paint job begin!
Updated November 15, 2018.


Looking for a Pro? Call us (866) 441-6648

Painting Average Costs
Painters Experiences

Professional Stain Adds The Finishing Touch To My New Cedar Deck
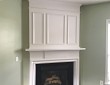
A Careful Interior Paint Job Increases Our Home’s Sales Appeal