End Grain Hardwood Floor Tiles
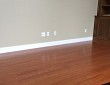
 End grain floor tiles have a lovely, distinctive look, yet are one of the most durable flooring materials you can buy. These square, brick-shaped, or hexagonal tiles are natural wood, cut across the grain from timber ends or reclaimed wood to reveal rich patterning. BONUS: Floors made of end grain tiles are much more affordable than standard hardwood.
However, end grain tiles comprise a very small percentage of the millions of square feet of wood flooring installed. Part of that is due to their rarity, as this type of flooring is typically not stocked at flooring centers and big box stores. The second issue has to do with the complexities of installation. End grain floor tiles are installed by a completely different method from their wood plank cousins. Whether you plan to DIY the installation or hire a flooring contractor, learn about the correct method.
Bring on the Adhesive
End grain tiles are set like ceramic or porcelain floor tiles -- with a trowel-on adhesive. But with wood tiles, the adhesive should be urethane-based; water-based mastic or cement-based thin-set would cause swelling of the wood fibers and lead to premature failures. End grain tiles, lacking the tongue-and-groove profile of most wood flooring, are not interlocking or “mechanically” attached to the sub-floor or substrate, via nails or staples. Adhesive, the only thing keeping these tiles in place, needs a proper cure. Without an interlocking profile, there will be a small gap between each tile and its neighbor, which can be filled during sanding or “grouted” similarly to traditional tile. Grout for wood, like adhesive, should be urethane or epoxy based and must remain flexible for the best, longest-lasting performance.
Installation Sequence
As with any flooring installation, the base or substrate needs to be solid, flat and free of debris. Because end grain tiles are set with adhesive, setting them on concrete is just as easy as setting on a wood sub-floor. The concrete needs to be fully cured and not releasing any moisture. This can often be months after the original concrete installation. Proceed as follows:
- Design the layout, with tiles, spaces, pattern, etc.
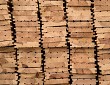
- Purchase tiles as individual pieces or engineered sheets.
- Allow several days after delivery for the tile to acclimate to your home, as with any wood flooring.
- "Dry lay" the tiles without adhesive to double check your layout (optional).
- Set tiles with urethane-based adhesive.
- Leave adhesive to fully cure. This can take 24-48 hours or more.
- Sand “raw” end grain tile. Initial sanding can be done with a drum or large belt sander. Engineered tile may or may not require sanding.
- Apply filler and or grout if needed.
- Finish sand using disc or orbital sanders. Higher grit sanding results in a smoother finish.
- Stain if desired.
- Apply 3 to 5 coats of a good oil-based sealer.
Grouting an End Grain Tile Floor
Grout and fillers are perhaps the most varied with an end grain floor. Some folks use putty fillers, some a mixture of sawdust and poly, some glue and sawdust or cork and sawdust with linseed oil. Commercial flexible grouts are usually a synthetic polymer blend, often containing a cork or sawdust filler. Some of these are applied before sanding; others after. It depends on the material chosen. The success of an end grain floor depends on the grout’s ability to withstand wood movement, which can vary widely with your local climate.
Test the Finish First
Wood grain is a bit like a bundle of soda straws, and end grain wood can absorb more stain and finish than plank flooring. As with any wood working project, test the stains and finish on some scraps to ensure your end results are satisfactory.
Maintain an End Grain Tile Floor
Maintain your end grain tile floor as you would any type of hardwood flooring:
- Sweep or vacuum regularly to pick up grit, which could scratch the floor.
- Dust mop or damp mop.
- Protect against excessive moisture.
- Buff the surface monthly.
- Reseal annually.
- Oil every two years.
Updated January 17, 2018.


Looking for a Pro? Call us (866) 441-6648

Tile Average Costs
Tile Contractors Experiences
I Paid My Contractor More Than His Price - He Was That Good

Tile Installation For New Kitchen Backsplash And Guest Bathroom Floor