DIY Kitchen: Live Culture Pickle Recipe from a Pro Fermenter
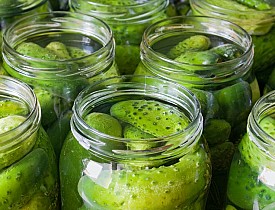 Home pickle-making is quite the rage right now. I use the term "pickle" in the broader sense, not to refer strictly to cucumber pickles, but as in vegetables preserved in brine. However, many people are not aware that there are two categories of pickles: The first is the more common sterile vinegar pickle, and the second, the live-culture lactofermented pickle.
The latter category is one of the oldest forms of preserving the harvest, and actually increases the nutrient content and digestibility of vegetables, and also increases immune system functionality. Types of lactofermented foods that you might be familiar with are kombucha, as well as any dill pickles and sauerkraut which do not list "vinegar" as an ingredient.
To receive the maximum benefit from live-culture pickles, you should eat about a tablespoonful at least twice a day. It's preventive medicine.
With Thanksgiving coming up and lots of winter squash readily available, I thought I would present instructions for making a lacto-fermented winter squash pickle. These types of fermented foods require time and patience, but the end result just might amaze you.
What You'll Need, in Addition to Normal Kitchen Utensils
-A wide mouth half-gallon jar or crock, made from glass, ceramic, or fermentation-grade plastic or stainless steel.
-A weight that fits inside the jar or crock. Two suggestions: a smaller jar filled with water or a non-reactive stone (washed and boiled beforehand). The point is to keep the vegetables weighted below the brine.
-A cloth or paper towel to cover the top of the jar or crock so that bugs and dust don't enter.
-A rubber band to secure the cloth.
-Smaller jars with lids to store your pickle when it is finished.
Ingredients
-2.5 lbs. pumpkin, butternut, or other winter squash, peeled, strings and seeds scraped out, and chopped into half-inch cubes or julienned.
-0.5 lb. rutabaga, peeled and julienned.
-1 medium onion, coarsely chopped.
-0.75 lb. cabbage, shredded in a food processor or julienned.
-1 tablespoon fine sea salt, or other salt with no added iodine.
-10 allspice berries.
-1 teaspoon yellow mustard seed.
-1 teaspoon whole coriander.
-3 bay leaves.
-3 cloves garlic, mashed.
Instructions
1. Mix the vegetable pieces together with the salt, and knead for a few minutes. The salt will draw out liquid from the vegetables to form the brine. Let this mixture sit for 10-15 minutes while the salt draws liquid out. If, after this "sweating" period the mixture doesn't look sufficiently moist, continue to knead for another 2-5 minutes.
2. Add the rest of the spices and knead until mixed.
3. Put the mixture into your half-gallon jar by the handful, applying pressure after every few handfuls so that the vegetables are packed tightly in the jar and brine is rising above them. If there is not at least a half-inch of brine, you can add a brine mixture of 1 tablespoon salt to one cup water.
4. Leave at least 1.5-2 inches of headroom at the top of the jar because as the vegetables ferment, carbon dioxide will be pushed up from the brine and may cause the mixture to expand.
5. Place a weight on top of the vegetables to secure them below the brine.
6. Fasten your cloth around the mouth of the jar with a rubber band. Store the mixture at around 65 degrees if possible and leave to ferment for 2.5 to 5 weeks (I recommend waiting the full five weeks).
7. If mold grows on the top of your pickle, have no fear. It's not dangerous; simply scrape it off and eat whatever is underneath. I have tried this many times. It's actually a normal part of lactofermented pickle making. Even commercial operations occasionally experience some molding and just remove that top layer before transferring to individual jars.
The lactofermentation process is actually the safest method of food preservation, in contrast to home vinegar-brine pickle making, which can cultivate botulism bacteria.
8. When it's done, transfer your pickle to smaller jars with lids, and store it in the refrigerator. These will keep at least six weeks or longer.
The vegetables are edible throughout the entire process, but they will be more tasty and easier to digest once they have been fully fermented. Notice that there is no need to add a "culture" since the bacteria that cause the fermentation actually live on the vegetables themselves.
For further reading about live-culture foods, check out Sandor Katz's Wild Fermentation.
Updated August 22, 2018.


Looking for a Pro? Call us (866) 441-6648

Average Costs
Related Experiences

New Kitchen Floor Tile After Water Damage

Baseboard Heater Inspection And Repair By A Determined Contractor