DIY Home Winterizing in 4 Easy Steps
 Whether you own a home or are renting, chances are you're already aware of the expenses involved in keeping your home comfortably warm. Home weatherizing can save you between 10 and 50 percent on energy costs.
If the idea of weatherizing seems overwhelming or expensive, remember you don't have to do all your weatherization projects all at once. Even if you just work on one room a year, eventually, you will have done a great, well-thought-out job. However, if you enjoy home improvement projects and feel comfortable with your DIY skills, you can get the work done in a few days, depending on the size of your home.
Step 1: Have an Energy Audit
The greatest energy loss in most homes is due to air seepage around doors, windows, ceilings, floors, and switch plates on exterior walls. A home energy audit will indicate these and other spots in your home where cold air seeps in and warm air slips out. There are two ways you can handle a home energy audit:
1) Look into what local governments and utility companies offer. Most communities will provide free energy audits as well as other services such as reduced costs for professional sealing and insulation.
2) Do it yourself. Close all windows and doors and shut off any ventilation or fans. Go from room to room (and don't forget the attic if you have one), testing for air seepage. The easiest way to "see" the air movement is to carry a lighted stick of incense. Keep a list of all the spots where you see air blowing the incense smoke around. As well, note any dirty spots, which sometimes indicate air leakage. For example, you will usually find a thick layer of dirt on the windowsill in older homes, come spring. Also, rattling windows rattle is a clear indicator you don't have a tight seal.
Step 2: Seal Up Your Windows and Doors with Weather Stripping and Plastic Sheeting
The easiest place to start home weatherizing is sealing windows and doors. If you can afford to have storm windows or new doors installed by a reputable company, problem solved. Otherwise, you may purchase inexpensive clear plastic window sheeting to cover your windows for the winter, in kits available at most hardware stores. You could also use weather stripping (foam stripping with adhesive backing) to fill in any cracks. Weather stripping can also be used around doors. You can also place rugs, towels, or craft items made for stopping drafts from beneath doorways.
Step 3: Use Caulk or Spray Foam to Seal Cracks
Assuming that your DIY home energy audit helped you find cracks where warm air escapes, your next step is to fill those gaps. Caulk can be utilized on cracks less than 1/4" around windows, or in walls or ceilings. Silicone caulk is relatively easy to use and clean up, but can't be painted. Acrylic latex caulk is also easy to use and clean up, with the additional advantage that it can be painted. For larger cracks up to ½", you can use expanding foam (in a spray can) to create a permanent airtight seal.
Step 4: Follow These Additional Home Winterizing Tips
• Close flues on chimneys and wood stoves when not in use.
• Install rubber gaskets around switches and outlets that are on exterior walls.
• Keep your floors warmer by adding area rugs and/or insulating the ceiling of your basement.
• Hang heavier cloth drapes or thermal curtains. Close them at night to lessen air seepage.
Updated August 19, 2018.


Looking for a Pro? Call us (866) 441-6648

Electrical Average Costs
Electricians Experiences
A Handyman To Reinstall My Microwave Before It Did Serious Damage
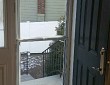
New Larson Storm Door Installed