How to Repair Torn Carpet

Carpeting is great. It adds color and coziness to any room and makes a home feel, well, homey. There's really no doubt about it - nothing pulls a room together like some good carpeting.
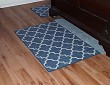
Which is why a torn carpet can be so aggravating. Besides standard wear and tear, carpeting can rip if heavy furniture is dragged on it or if the pet uses it to sharpen its claws or teeth.
Stained carpeting is upsetting as well. There are several ways to remove carpet stains, but for stains you can't get out, you can apply the steps below to completely replace the stained area.
Feeling a little wary about doing it yourself? You can call a carpet guy if you want, but it'll cost you hundreds. Repairing a torn carpet on your own may seem daunting, but it isn't that complicated. You'll save yourself lots of money and your carpet will look as good as new when you're finished. Let's get started!
You're gonna need a few things first:
- Matching piece of carpet - If you have some leftover carpet from when it was installed, great. Otherwise you can always steal a piece from the back of a closet or from underneath some furniture that you'll never move.
- Carpet knife - It's sharper than a standard box-cutter and grips better too. But the real benefit of a carpet knife is that it helps you cut straighter and neater. You can buy a carpet knife for about $7.
- Carpet tape - You'll need a roll of heavy-duty carpet tape. It will cost you about $5. Because you only need to stick the replacement piece to the existing carpet, one-sided tape is ideal. Double-sided tape will work too because you don't need to remove the adhesive backing on both sides.
Here's what you need to do:
- Use a screwdriver to impress lines into the carpet, forming a perimeter around the damaged area. These will be your cutting lines and should be a half inch or more away from the hole or stain.
- Use your carpet knife to cut along the lines you've just marked. Do your best to cut as straight as possible.
- Use the cutout as a guide to cut a piece of the same size from your spare carpeting. Make sure the nap of the new piece matches up with the nap on the piece you're replacing. What is the nap? The raised fibers of a carpet, which run in a specific direction. If the nap of the replacement piece isn't facing the same way as the rest of the carpet, the repair will not only be noticeable - it will look as if you have a patch of carpet that's a different color and texture.
- Cut four pieces of carpet tape, each a bit longer than the sides of the cutout. Don't remove the adhesive backing until you do a dry run. You want to position each piece of tape (sticky side up) so that half is under the existing the carpet and the other half will end up under the replacement piece. You can use a marker on the carpet padding to ensure you position the tape properly once the adhesive backing has been removed.
- Very carefully remove the adhesive backing from the first piece of tape. (If you're using double-sided tape, only remove one side.) Pull up the carpet with one hand and slide the tape into position with the other hand. Repeat for the remaining pieces.
- Now it's time to insert the replacement piece. Start with one side so that you match it up perfectly. Go in the direction of the nap as you press the edges of the piece securely into place.
- The pros use a spiked roller called a "carpet tractor" to mesh the fibers, but you can use a rolling pin instead. Trim any wayward fibers with a pair of sharp scissors, then place a pile of books on the area and let it sit overnight.
Now your carpet looks great and you'll appreciate it even more because you did it yourself.
Updated August 5, 2018.


Looking for a Pro? Call us (866) 441-6648

Flooring Average Costs
Flooring Contractors Experiences

A Local Pro To Install My Bathroom Floor Tile Was The Best Choice
I Paid My Contractor More Than His Price - He Was That Good