Options When There Are Splinters in Your Wood Floor

With the test of age, every wood floor can start to develop splinters, especially in high-traffic areas like that spot under your desk you’re abusing with a rolling chair. Splinters in a wood floor can be painful for barefoot walkers, but they’re also a one-way ticket to slowly but steadily destroying the floor and the finish, so act quickly to deal with them. Fortunately, you don’t need any special skills, just the following simple method for DIY wood floor repair.
Don't Pull Splinters
If you notice splinters developing in a wood floor, your instinctual reaction might be to pull them up. That’s a bad idea, because you’ll yank up a chunk of wood with them, creating an unsightly crack in the floor, and you’ll leave the ragged wooden edges exposed. Those are going to create more splinters!
Prep and Glue
So start by carefully lifting the splinter and cleaning the area beneath it to remove debris (dental floss, no lie, can be useful for this). Make sure the splinter itself is clean too, and if it’s become fully separated, wipe it down with a damp cloth to remove dust and wood fragments. Once your floor is prepped for the OR, as it were, use a toothpick to lay down a thin line of wood glue. Think small quantities here, because it will result in less of a mess later!
Let Glue Set
Carefully press the splinter back into the floor, keeping it well aligned. Once it’s in place, you can use painter’s tape to keep it in position while the glue sets. For bigger splinters, take a sheet of wax paper, lay it over the splinter, and weight it with a heavy book or a set of free weights. This will reduce the risk of bending or buckling while the glue sets, keeping the splinter flush with the floor.
Sand and Varnish
When the glue is set (give it around 12 hours) gently remove the tape or paper and use a fine-grained sandpaper to smooth the floor. Do this by hand, and gently, to avoid creating more splinters. In the event there’s a chunk of wood missing, fill it with wood filler (available at many hardware stores) and allow that to set before sanding to keep the surface of the floor even. Finish with a layer of varnish, if appropriate, to keep the mended spot looking like the rest of the floor.
When to Use an Orbital Sander
For larger splinters or areas of the floor where wear is becoming a big problem, you may need to do a larger spot refinish with an orbital sander. Gently sand down the floor, but not too much, or you’ll need to do the whole room, to even out a splintery area. Follow with a layer of wax and/or varnish to seal the floor and protect it.
When to Refinish the Entire Floor
Older wood floors may be too damaged for these measures, especially if they’ve had a rough life. In their case, you may need to consider refinishing an entire room. Sanders are available for this purpose, or you can hire a flooring specialist to handle it. The entire floor will need to be sanded down to remove the top layer of damaged wood, followed by varnishing and waxing. This can help give your floor new life, but you can only do it so many times before the floor will be too thin to refinish.
Protect Your Hardwood Floor
To proactively protect a floor after you’ve refinished it or before it’s started to wear, make sure to put felt pads under the legs of heavy furniture, and consider laying some mats down in the kitchen to intercept falling objects that could dent or gouge the floor, creating an easy "in" for splinters. Mats will also be a relief for your feet when you’re spending a long day in the kitchen working on projects.
And, oh yeah—add a floor protector under your rolling chair.
s.e. smith writes for Networx.com. Photo by Egan Snow/Flickr Creative Commons.
Updated January 10, 2018.


Looking for a Pro? Call us (866) 441-6648

Flooring Average Costs
Flooring Contractors Experiences
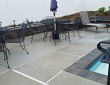
Seamless Extension Of Concrete Patio And Poolside Retaining Wall
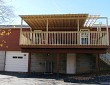
New Stairs And Roof Installation Are The Perfect Deck Upgrade