How to Build a Rot-Proof Wood Fence
") Fences are normally built for two reasons: 1) To provide some level of containment, whether this is for the family dog or a herd of cattle grazing in the back forty. 2) To provide a visual barrier. Over the years I have built a good deal of both. During graduate school I worked at an equestrian center and maintained more fences than most would see in a lifetime.
Fences are normally built for two reasons: 1) To provide some level of containment, whether this is for the family dog or a herd of cattle grazing in the back forty. 2) To provide a visual barrier. Over the years I have built a good deal of both. During graduate school I worked at an equestrian center and maintained more fences than most would see in a lifetime.
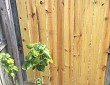
Fences, like personalities, can vary widely. Common types include chain link, welded wire, split rail, vinyl pickets, and cedar "dog ear." The posts for these fences range from simple metal "T" posts, to logs and sawn lumber. The basics of straight line and plumb are universal to any good fence; the post placement is where it gets complicated when you're dealing with wood fences.
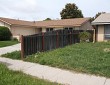
Wood post failure due to rot
Wood post failures comprise a good portion of the repair work I have done over the last few years. The most common failure is wood rot at ground level, leading to a lack of support which causes the post/fence to tip over. Sometimes whole sections of fence will fail this way ("cascade failure"), since one post helps support its neighbors. Here in the Denver area, we are no strangers to windstorms where healthy 8-10" diameter trees get snapped like toothpicks. When a rotten post base with dozens of square feet of exposed fence "siding" is exposed to these winds, the results are pretty predictable.
Limit soil-to-wood exposure
One method I use to extend the life of these posts is limiting the soil-to-wood exposure. Lumber set directly in soil will fail the quickest. Rot-resistant wood (pressure treated, cedar, redwood, etc.) helps, but this material is still subject to nature's microbes.
While setting the post in concrete is better, it still leaves some areas vulnerable. In a recent rebuild, the concrete-encased portions of the posts were fine — the post's failures were a few inches above the concrete where soil had been back-filled. Years of exposure to wet soil acted like a microbial saw, which nibbled away at the wood's strength. With one end of the post firmly secured in the concrete, and the post top and fence subjected to wind forces, the ground-level failure point was guaranteed.
Ironically many concrete manufactures recommend poor installation methods, and common old school methods die hard. The old school method of digging a hole, inserting a post, adding dry concrete and then flooding the concrete-filled hole does work … but it is less than ideal.
A better method of setting wood fence posts
Here's a better method:
- dig the hole
- line the bottom with some crushed rock
- set the post on the rock
- mix concrete outside the hole in a mixing tray or wheelbarrow
- add the concrete to the hole.
Mixing the concrete separately ensures a stronger pour and elimination of dry "voids." The concrete's fill depth is critical to longevity. Some fence designs will have the footers poured in "tubes" and extend above the soil height. Others will pour concrete close to soil level.
In both cases the top of the concrete should be shaped with a slight "crown" to allow water to drain away from the post. If the top of the concrete is below or near grade, I like to back fill with the same crushed stone used earlier. This eliminates the soil-to-wood contact zone above the concrete. The coarse crushed stone allows moisture to dissipate near the post base.
For help with fence installation and repair, find a qualified professional.
Updated January 8, 2018.


Looking for a Pro? Call us (866) 441-6648

Landscaping Average Costs
Landscapers Experiences
Rotted Fence Repair Taken Care Of Fast And Efficiently

The Best Contractor: Prompt, Accurate And Ready For The Unexpected