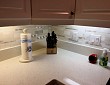
Budget Backsplash Ideas
") A limited budget might put a kibosh on the dream kitchen remodel that’s on the top of your home improvement bucket list. Fortunately, even an old, dingy kitchen can be spruced up by installing a bright new backsplash that will showcase your style and creativity.
A limited budget might put a kibosh on the dream kitchen remodel that’s on the top of your home improvement bucket list. Fortunately, even an old, dingy kitchen can be spruced up by installing a bright new backsplash that will showcase your style and creativity.
Though tile is the No. 1 choice for backsplashes because of its durability, if your budget won't allow you to hire a professional tiler, why not try something different? These 4 low-cost alternatives require only minimal expertise ... in exchange for big visual impact:
1. Wallpaper
Wallpaper is simple to use as a DIY backsplash because you’ll be handling short pieces. Heavy-duty vinyl-coated paper can withstand lots of abuse and is easy to wipe down. It hides a multitude of sins, minimizing wall defects.
Shop for wallpapers made for kitchens and baths, as they tend to be heavier weight, or textured papers. “Paintable” wallpapers come in every style imaginable – from geometric shapes to textured fabric to Venetian plaster – and are an excellent choice when you want to coordinate them with existing kitchen decor. After installing and painting this type of wallpaper, apply 1-2 coats of water-based acrylic polyurethane to increase water resistance.
TIP: Run a bead of clear silicone caulk (non-glossy) along top and bottom of the wallpaper to prevent it from lifting.
2. Pegboard
No longer limited to the workshop or garage, a pegboard backsplash is a perfect choice to organize your kitchen sink area. Manufacturers offer a plethora of accessories including hooks in all sizes, bins, shelving and baskets.
Pegboard comes in several materials – hardboard, metal (including stainless steel) and polypropylene. The most expensive option, metal pegboards are offered in the widest variety of color choices. Hardboard is cheapest, but armed with a can of spray paint, homeowners can convert the dull brown board into something bright and beautiful.
Slat-wall systems also fall in this category, utilizing horizontal grooves instead of holes for pegs. Originally manufactured to showcase retail merchandise, their popularity has increased in alternative applications because of their selection of organizing accessories and modern look. They also come in a variety of finishes. Expect to pay slightly more than you would for pegboard; you'll gain the advantage of being able to customize colors.
3. Wall Panels, Planking and Wainscoting
Can you say “affordable"? Melamine or composite wall paneling, composite planking or wainscoting can be installed in less than a day and is probably the most inexpensive choice for a backsplash. Cheap and easy doesn’t mean it has to be ugly – some panels are made from hardboard or MDF, but many boast veneers including birch, oak, or textured faux brick. Some are designed to resist high impact, mold and mildew. Cut to size, they can be fancied up by edging with decorative trim.
TIP: If you choose a panel with a wood veneer, whether you leave it natural or apply a custom stain, be sure to apply 2-3 coats of clear polyurethane for water resistance, and seal edges between the board and countertop with clear silicone caulk.
4. Wine Cork
Feeling artsy and a tad ambitious? A wine cork backsplash is not for the faint of heart, but the finished product is absolutely beautiful and unique. Start collecting corks far in advance (you’ll probably want to elicit the help of friends and acquaintances), because this project takes a lot of corks!
Installation is time consuming but not difficult: Purchase and cut a ¼ piece of plywood to exactly fit the space you want to cover. You’ll need to install, and then uninstall, the board – marking places where you can hit a stud to attach it securely to the wall. Once you’ve completed this step, remove the board and lay it flat to attach the corks. Cut each cork in half lengthwise and glue to the board in your chosen pattern (such as herringbone or straight up/down). Leave cork-size openings in places marked for reattachment – you can fill these spaces after it’s rehung.
TIP: Use strong adhesive made for cork material; otherwise, the cork will loosen and eventually fall off. To seal, use high-gloss or semi-gloss varnish for protection against water and seal top and bottom seams with a bead of clear silicone caulking.
Updated October 14, 2018.


Looking for a Pro? Call us (866) 441-6648

Remodeling Average Costs
Remodeling Contractors Experiences
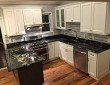
My Beautiful Kitchen Remodel Optimizes The Space
Can’t Find A Prefab Shed You Like? Try Custom Carpentry Instead